Uncharted 4 - Puzzle Solutions

Stuck on a puzzle in Uncharted 4? Here's our handy puzzle guide that will help you every step of the way!
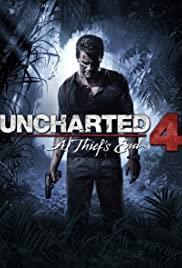
Chapter 2: Zodiac Puzzle
After taking the climb to the tower beyond the prison, you'll drop down into a cell to find the Zodiac Puzzle. As you can see around you, several stones are marked with roman numerals.
To solve this puzzle, first take a look at the Sun & Moon symbols on the wall.
Next, take out the letter in your possession and press the triangle button to flip it over. You'll notice two symbols on the paper. By finding the symbols on the wall, you'll notice one is equal to roman numeral X (10), while the other is equal to roman numeral II (2).
Add those two numbers together in your head and you'll get 12. Find the stone in the wall with roman numeral XII (12) on it, press triangle, and you'll trigger a cutscene to get what you seek.
Puzzle Solved.
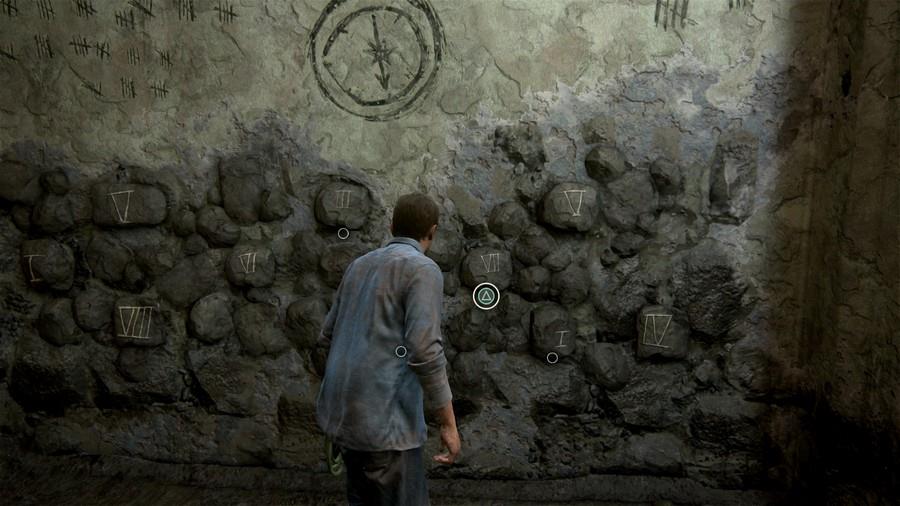
Chapter 8 - Avery's Grave Puzzle
First off, if you're stuck looking for Avery's grave, it's at the end of the cemetery, near the edge of the cliff.
As for the actual puzzle below the tombstone, once Sam lights a flame, you'll see three statues that you can interact with on the other side of the wall. Each one has two lights that illuminate beams to the other side of the wall onto what looks like a passageway with a vertical crack running between a set of doors.
The middle statue's lights need to align with the two spots at the very top and the very bottom of the doors. After this, align the right statue's beams onto the top spot on the left side of the crack and the bottom spot on the right side of the door. If done right, the left statue's beams will be able to illuminate onto the final two spots.
Puzzle Solved.
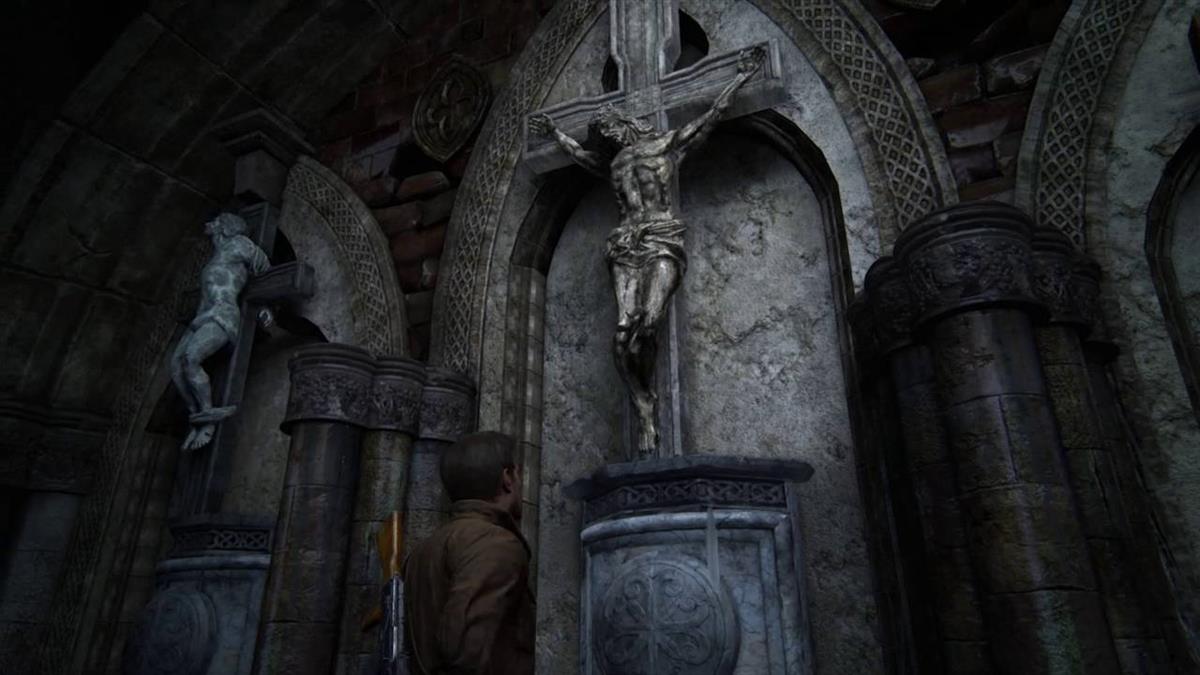
Chapter 9 - The Cross Puzzle
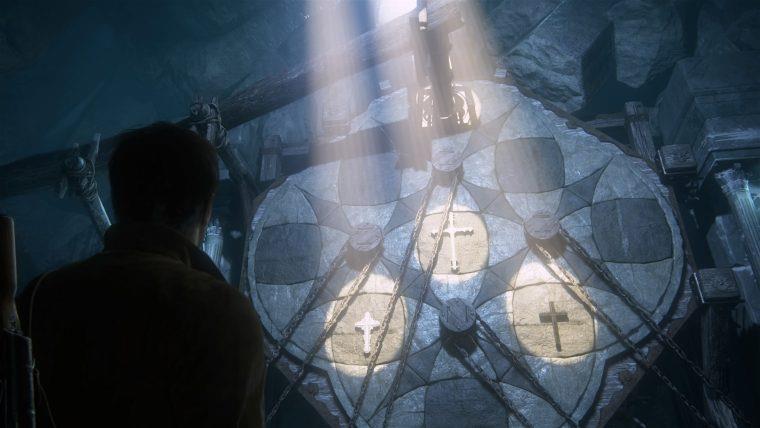
Time to prove yourself worthy.
Unfortunately, this puzzle is completely randomized for every player, but first thing's first, grab the bucket, hop down to the nearby bed of water, and fill it up. Hand it to Sam over at the ledge when you're done. He'll put it back in its place and 4 wheels will suddenly be revealed.
You want to spin the wheels in a way that will line up the crosses in the light, just as pictured above, with the bucket at the top spot.
Once done, you can try to open the door.
Chapter 11: The Bell Tower Puzzle
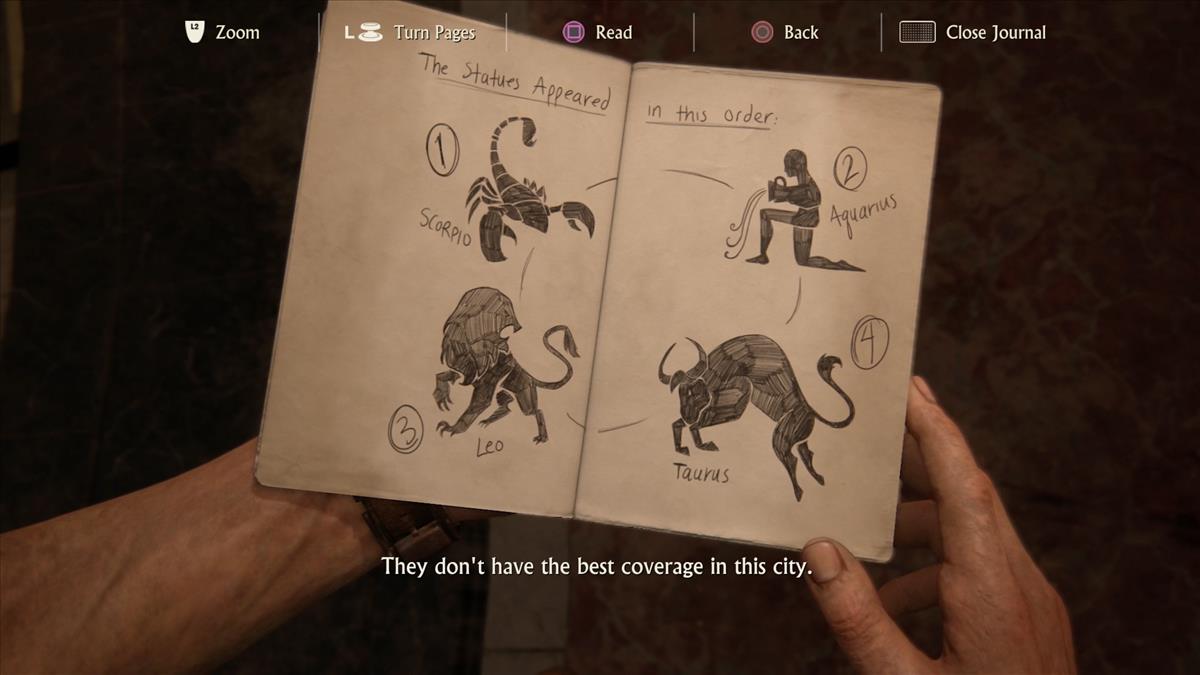
Welcome to Avery's clock tower of secrets.
Here you want to ring the bells in the right order. As you can see in Nathan's journal, each statue associated with a bell is marked with a number, from 1 to 4. The hardest part is maneuvering around the tower to get to the correct bell and ring it.
On the first platform you reach, you'll see Leo. Instead of ringing the bell, because it's meant to be rung after Scorpio and Aquarius, use the gears in front of the platform to climb up and to the left to reach the Scorpio bell.
Ring it.
Now, on the left you'll see some gears that lead down to the Aquarius bell platform. Take them.
Ring the Aquarius bell. Now, we have to get back to Leo, so head to the far end of the platform and jump THROUGH the gear, then use the counterweight to climb around the corner and back up to the Leo platform.
Ring Leo's Bell.
To reach the final bell, Taurus, climb back up towards the Scorpio bell, but instead of using the large gear to climb down, use the ones to the left of it to climb up and jump to the swinging pendulum. Leap from the pendulum to reach the fourth bell.
Ring it.
There's one more bell to ring and it's at the top of the tower. After the cutscene, a staircase will be made for you that will bring you to a rope. Use it to swing across to the other side of the tower.
To temporarily stop the clock's mechanisms, climb onto them. While they're paused for the moment, climb up the large gear and jump to the wooden platform behind the face of the clock.
You'll need to climb outside from here, but in order to do so successfully, from the inside you'll need to climb onto the gear just behind the giant clock to position the minute hand in a way that stretches out towards the 15-minute mark. It's safer if you move it closer to the 10-minute mark because once clinging to it, Nathan's weight will pull it down some, possibly altering his ability to quickly maneuver to the other side.
Once you've made it across, continue climbing up and ring that bell.
Chapter 11 - Founders Wheel Puzzle
Once under the tower in chapter 11, you're going to get acquainted with some pirate captains.
At the start of the puzzle, you'll see two images - A skull and crossbones on one block & an arm and sword on the other.
Turn the skull and crossbones counter-clockwise one move, & turn the arm and sword clockwise one move.
You'll be presented with a new set of images and a nearby door will open. You MUST go into the room and acknowledge a hidden square in each of the paintings.
In the first room, the square in the first painting is on the pirate's red cape. Use L2 and triangle to acknowledge the square and jot the information into Nathan's journal. The square in the second painting is under the pirate's left hand. The square in the third painting is under the pirate's arm that is bent at the hip. You don't have to worry about lining up the sketches in Nathan's journal. You may close the journal using the DualShock 4's touchpad.
Return to the puzzle.
Turn the two warriors counter-clockwise one move, the horse gets turned clockwise one move, and the dragon gets turned clockwise one move as well.
Take a photo for Sam and move to the second room. In the first painting, the square is in the base of the sculpture to the left of the pirate, in the second painting the square is just above and slightly to the right of the globe. Help Sully get the third painting back onto the wall. In this painting, the square is hidden within the painting's wall, to the right of the pirate's sword.
Return to the puzzle.
The sea creature gets turned clockwise one move, the three arrows get turned counter-clockwise one move, and the pair of skeleton hands get flipped upside-down.
In the last room, the square in the first painting is hidden to the right of the pirate's tool belt, the square in the second painting is up towards the right corner, the square in the third painting is on the maroon cloth wrapped around the pirate's torso, and the square in the fourth painting is on the pirate's carrying bag.
Return to the puzzle.
The scale gets flipped upside down, the snake gets turned counter-clockwise one move, the monkey gets flipped upside down, and the tiger needs to be turned clockwise one move.
Puzzle solved.
Chapter 12: The Wheel Chamber

This one may be the toughest because you're given no clues in Nathan's journal to solve it. Ascending vertically, you're going to need to move three different sets of rings around in a way in which the light will shine upon the right symbols.
Ring One:
- Move the ring 1 space to the right.
- Rotate 3 times
- Move the ring 2 spaces to the left.
- Rotate 6 times so that the W is facing out.
- Now you may move the spheres into the light.
Ring Two:
- Move the ring 4 spaces to the left. The right orb should move, but the left should remain in place.
- Rotate 2 times
- Move the ring one space to the left. The left orb should move, but the right should remain in place.
- Rotate 4 times.
- Now you may move the spheres into the light.
Ring Three:
- Rotate dials 4 times
- Move the ring 2 spaces right. The right dial should move, but not the left.
- Rotate the dial 6 more times
- Now you may move the spheres into the light.
Puzzle Solved.
Chapter 19: Avery's Death Trap
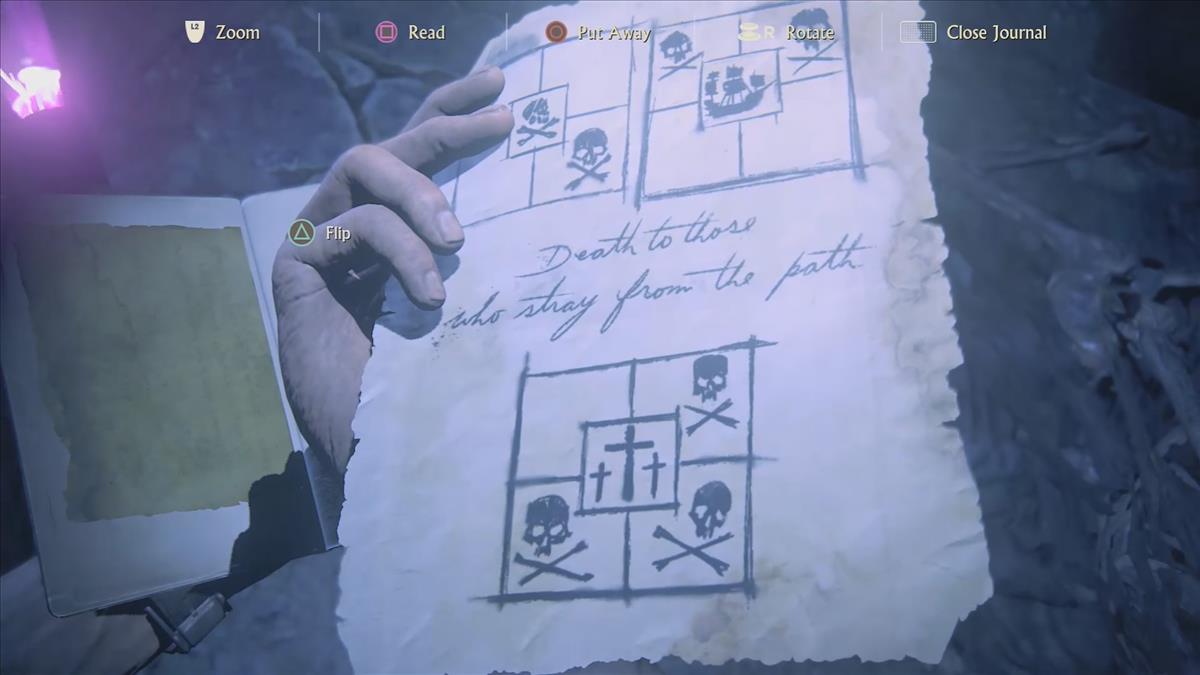
Here you'll come to a group of wooden squares laid out horizontal. Some are safe to step on and as we're sure you may have noticed, some will get you killed. By matching the symbols in Nate's journal to symbols found within each set of four squares, you'll see which ones are safe.
If you don't have the patience for that, here's a guide:
1) Starting from the second wooden square from the left on your end of the cave, it's safe to walk on the first four squares in front of you. You should end up right in front of a spot where there's no wooden square at all.
2) Now walk three squares to your right.
3) With Nathan facing the end of the cave he's trying to reach, walk on one square in front of you.
4) Now, take the one to the right.
5) The last wooden square between Nathan and the side he's trying to reach is safe to walk on. You can safely take it to the other side.